★ Win a Bore Tech rifle cleaning kit worth £491! Click here to enter ★
From field to freezer Part 1
For any stalker, maintaining food hygiene is paramount. Alex Hatton explains the best practices for processing deer, including bleeding, gralloching and butchering
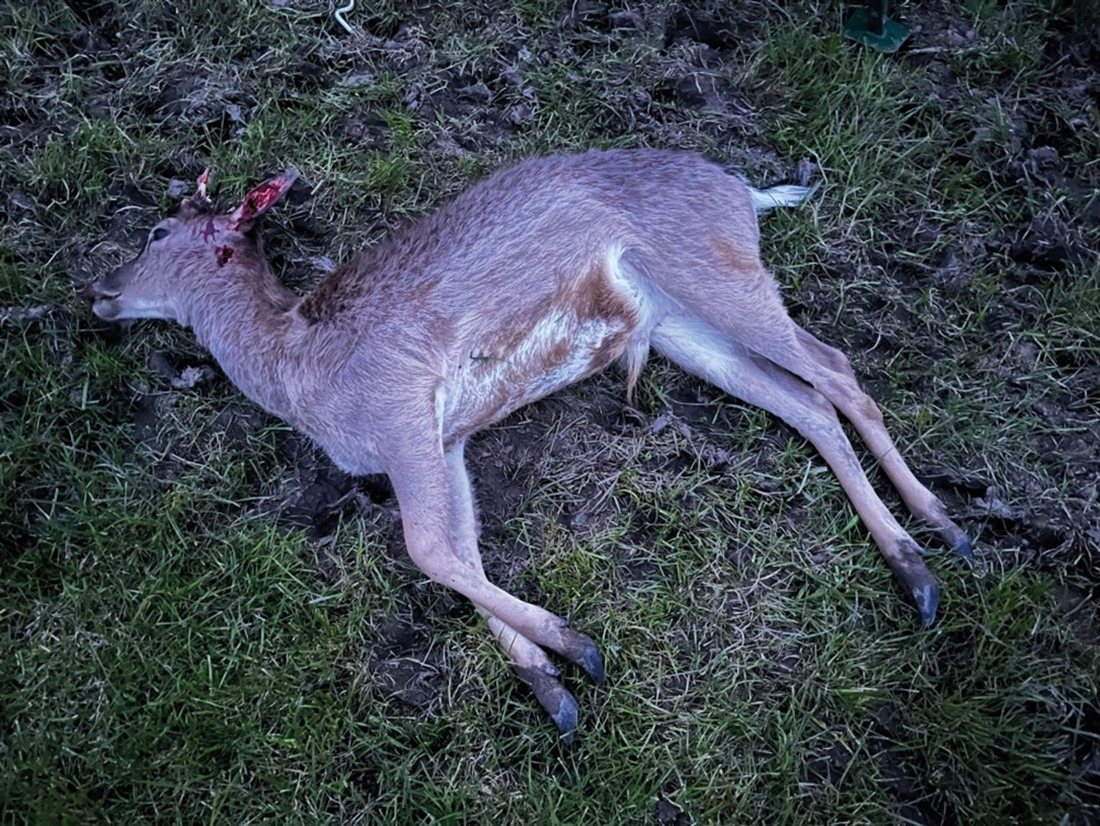
Putting venison into the freezer is unquestionably one of the most fulfilling parts of deer stalking. Although everyone has their own methods of processing a deer, food hygiene must form the basis of how you get a deer from the field to the freezer. Whether you are a recreational stalker or a professional guide, food hygiene starts the moment the deer hits the ground – which should also be the last time it does so.
The steps outlined in this article are a full field gralloch and red offal removal, as my lowland carcasses are extracted by vehicle. In the highlands of Scotland it is often necessary to retain the red offal, head and legs, and just remove the green to keep the risk of internal contamination minimal.
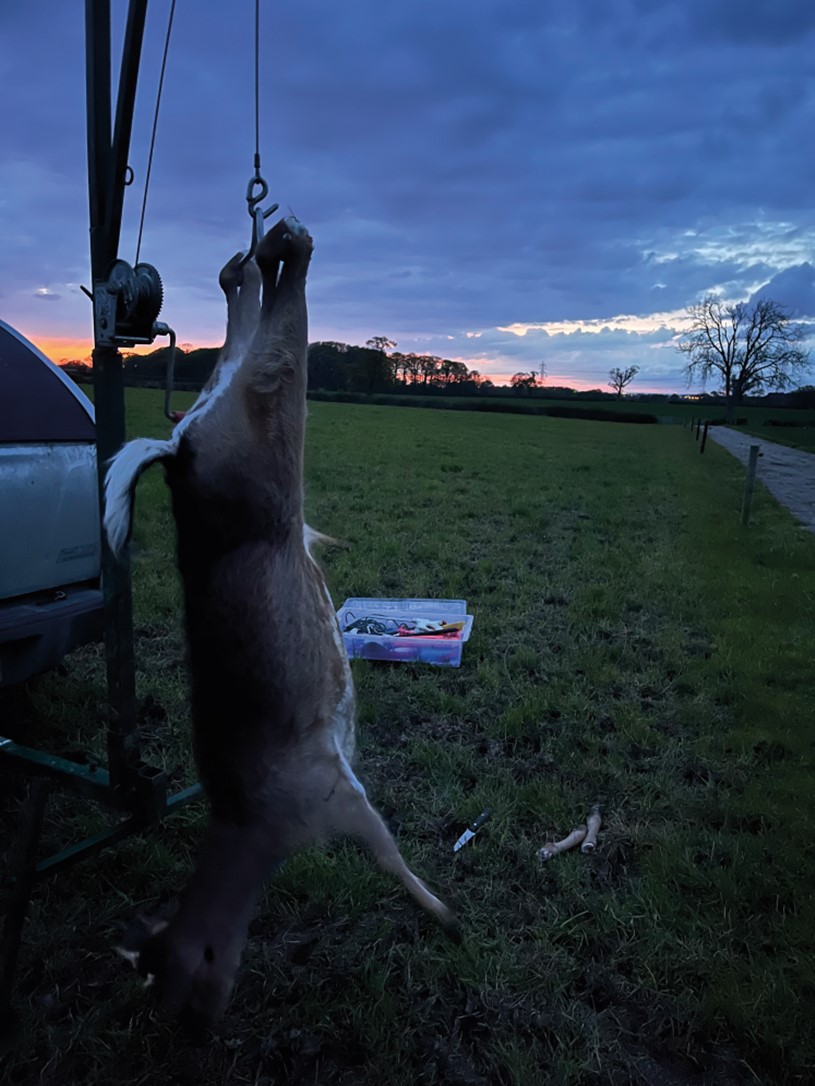
Where the deer is shot certainly dictates whether I carry out a gralloch on the ground or suspended; the latter is my preference. The first task is to bleed the animal if it has been head or neck shot. This is achieved by sticking the knife into the base of the neck, just above the sternum, and cutting across the mass of arteries in a side-to-side motion. The last beats of the heart will pump the blood out of the carcass, improving the quality of the meat as blood is one of the first things to spoil.
In order to hang the carcass you cut a slit in the hock. This only needs to be big enough to insert the gambrel, so don’t make the mistake of cutting into the haunches. The lower legs can then be removed. It is easy to find the right spot on the front legs by bending the leg at 90°. You cut around the front of the knee and right the way around, then pull the leg sideways at 90° and it will pop off.
For the rear legs this takes a little more practice. There is a small lump below the hock that you can feel by hand. You need to cut around the leg at this point and pull it back on itself to snap it off. If you get this slightly wrong, you will snap off the joint a little too high and into the hock. My advice is to then cut in the right place with a saw so you can still hang the carcass by the hock.
Before I remove the skull I like to expose the oesophagus and trachea. This is achieved by cutting just under the skin from the sternum to the jaw. You will see the trachea and running alongside it is the oesophagus. If you separate this from the trachea you can tie a knot in it, which will stop the stomach contents coming out.
Now you need to remove the head. What you are trying to find is the atlas, which is the joint between the spine and the skull. The easiest way to find this is to cut straight down between the ears and right around the neck. If you can expose the gap between the atlas joint and the skull, you can gently twist the skull at a right angle and it will come off.
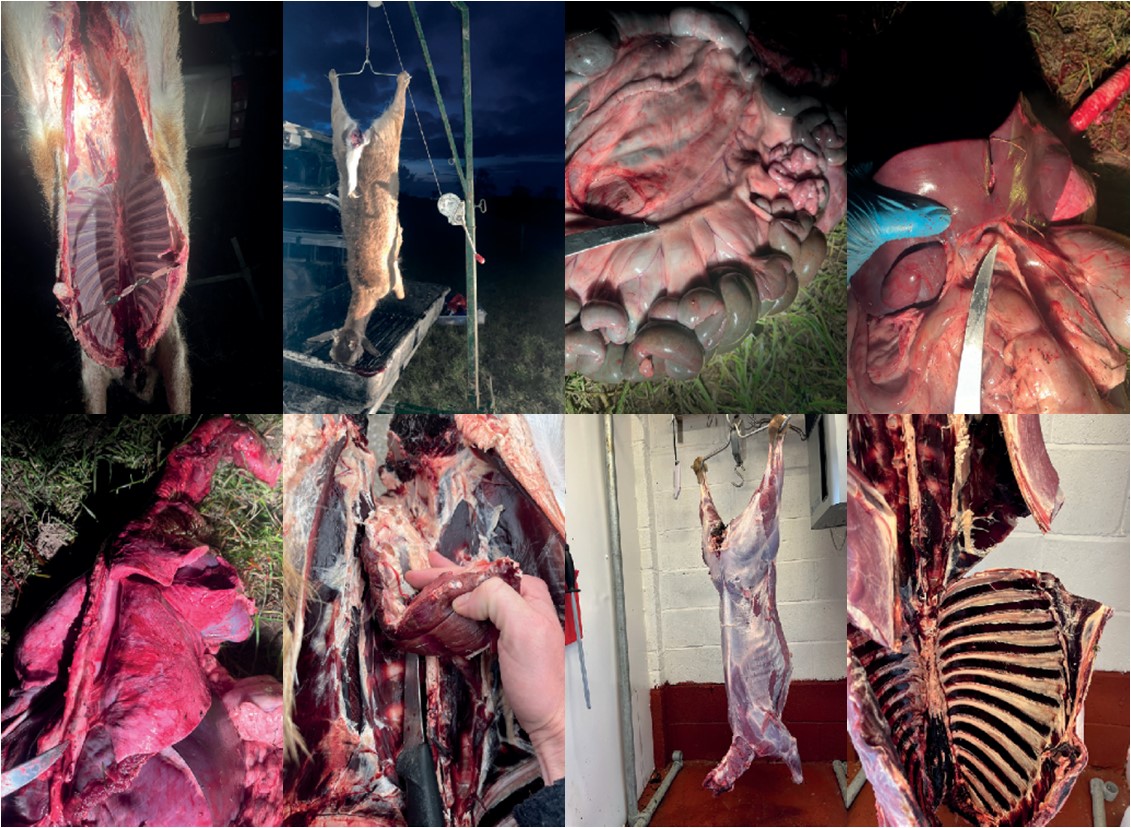
As I will be doing a full red offal removal, the next The shot is only the beginning. Just as much skill is required when it come to handling the carcass stage is to unzip the skin from the stomach through to the end of the rib cage and then cut through the ribs. As you unzip the skin, keep your finger on the tip of your knife to ensure you do not pierce the stomach.
We now move to the other end and removal of the genitals and anal cavity. I have seen many different ways of removing the latter, but my preferred method is to cut around the anus from the outside and once it is free, twist it in a circular motion to separate it from the pelvis as much as you can. A cable tie or tying it in a knot will ensure nothing comes out and contaminates the carcass.
The testicles/penis are traced with the knife back through the pelvis to where they meet the bladder, cutting either side of the tube gently through the muscle. They are then left hanging while you work on easing the anal tract and bladder through the pelvis. As the penis, testicles and tubing are reunited with the bladder and anal tract they can be pulled through the pelvic tunnel, still attached to the gralloch. With gravity on your side, we can now remove the green and red offal in one piece. Starting with the stomach, as you start to ease it forward you will see that it is attached along the back of the cavity and you can gently cut this attachment. Once at the diaphragm you can cut all the way around it to get at the red organs. Some small additional cutting will be required to ease these out of the chest cavity.
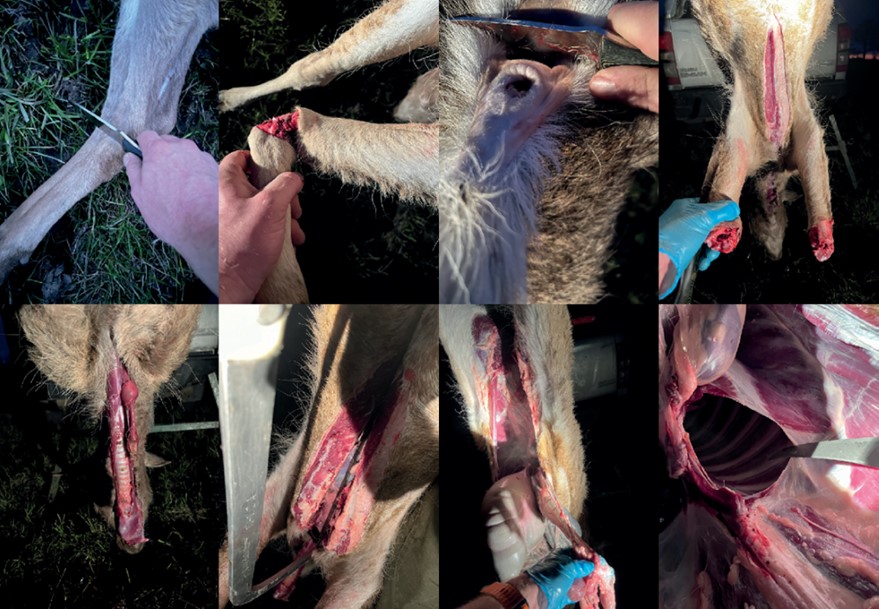
Removal of the rear legs. Cut at this point right the way round
Removal of the front leg
Cut here before grabbing the anal tract and easing it loose
Expose the oesophagus and trachea by cutting just under the skin from the sternum to the jaw
Bottom L to R:
Ease out the oesophagus and the trachea and then tie the oesophagus
Cut through the rib cage to ease the removal of the green and red offal
Let gravity do the hard work to get the gralloch out
Cut around the diaphragm to ease out the heart and lungs
The carcass can now be loaded into a hygienic carcass tray with a blood separator. While you will have done your first checks of animal’s the health before the shot and then before the gralloch, our next job is to do an inspection of the lymphatic system. Your shot placement will determine what lymph glands will be available for inspection. The mesenteric chain is easily found by turning the stomach upside down so that the small intestine is exposed; it chain runs underneath the ‘sausage’ arrangement.
The portal lymph node is found at the attachment point of the liver. The mediastinal and bronchial lymph glands are found alongside the lungs. If the deer has been lung shot they will be very difficult if not impossible to find. If the animal has not been head shot, the submaxillary lymph glands are found at the corner of the lower jaw after removing the tongue. At the back of the throat are two long lymph glands called the retropharyngeal – they require a little cutting to expose them.
If there is anything wrong with a deer it will be very obvious, and at least one or a number of these lymph glands will be swollen and filled with pus, around the size of a golf ball or more. If you suspect that the deer might have TB or another notifiable disease you should stop, leave the carcass where it is, and report it to the appropriate agency.
Part of the processes is to maintain what is referred to as the cold chain. For deer this is at or below 7°C and it should not go above this. This should be a consideration when shooting in the summer months as it may mean shooting fewer animals so that you can get it back to the larder within a reasonable time to maintain the cold chain.
If you are new to venison, then how long you wish to hang carcasses for in the chiller will be something you build a taste for. I like to hang fallow prickets for a week, but an older red hind or stag from 10 to 14 days depending on the age. The older the animal, the longer it takes to get them to my eating preference.
Once it has aged to your taste you can remove the skin. This will look a little untidy at first but you will get better with time. Starting at the top end, I use the roeing knife to cut the skin from the inside of the haunch alongside the pelvis up to the hock. Once you have freed both hocks you can start to peel the skin carefully down the carcass. Before I get too far down the carcass I like to remove two strips, along the side of both ribs up to the haunches. This makes for a cleaner skinning job as you continue to pull the skin down the back of the animal.
A beautifully clean carcass
The swivel hoist allows the clean and easy transfer of the carcass to the vehicle carcass tray
The mesenteric lymph chain
Portal lymph node
Bottom L to R:
Mediastinal lymph node
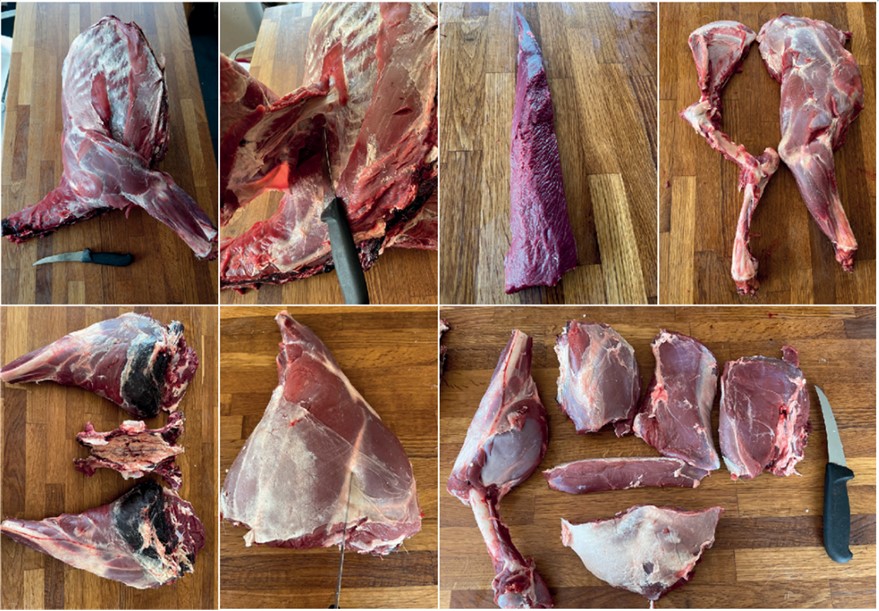
Removal of the fillets – found on the inside of the rib cage alongside the spine
The skinned carcass ready for butchering
To separate the forequarters from the ribs, cut along the rearmost rib
Long before you get to the shoulders, use the roeing knife to cut up the front leg and peel the skin off around them and the ‘armpit’. Also remove the skin around the brisket and neck, which will make it easier to peel of the final bit of skin.
With your skin now removed, its time to break down the carcass. Everyone has a repertoire of what sort of food they like to eat and your butchery will reflect this. I have little need for huge joints, so I favour continental butchery – breaking down large joints into the various muscle groups, small stewing joints, steaks and mince.
I use three tools for this part, a Mora roeing knife, a Victorinox 5″ flexible boning knife and a bone saw. The first task to remove is the fillets, found on the inside of the chest cavity underneath the saddle. When you remove them make sure to go up into the eye of the fillet, just beneath the pelvis.
To make the carcass more manageable I now cut just behind the last rib, separating the forequarters from the saddle and haunches. This smaller piece I can now butcher on a table. The shoulders can be easily removed from the rib cage as there is no ball joint, just cartilage and muscle. I favour stripping these entirely, keeping some for stewing and mincing the rest.
I now remove the sirloins, which run from behind the neck to the end of the rib cage. Once removed, the silver skin can be cleaned off and there is a strip of muscle running up the side of them that can be pulled off and put in your mincing pile. The rib cage can now be stripped; I like to strip the meat from between each rib and add it to the mincing pile as well.
Now we can work on the more expensive end of the carcass. The first job is to cut between the haunches and the saddle. By feeling with your fingers you will find a bump at the end of the saddle that you need to cut in front of and follow the natural line between the saddle and haunches.
The next task is to make the haunches more manageable. Removing the pelvis takes a little practice, but with the inside of the pelvis pointing upwards you just need to use the tip of the knife and slowly expose the ball joint. When you are far enough through it, flip it over and cut along the bone until your two cuts meet. The flap of meat you have now exposed is the rump and can be removed.
You will now notice the natural seams of the meat and it is these you need to open, carefully, with a combination of small cuts and prising them open with your hands. As you open them up you will find the salmon cut hidden on the inside.
You will need to work the thick cut from the bone to remove it, which will leave just the shank attached to the entire haunch bone. These muscle groups can be cooked as small roasts or cut down into steaks.
Whatever you decide to do, a vacuum packer is the best way to keep your venison at its best in the freezer until it is ready for a culinary delight.
Celebrate Great British Game Week with 20% off our annual subscriptions. Click here to shop and use code GBGW24.
Offer valid 4-10 November 2024
The front half ready to be worked on
Removal of the shoulder from the rib cage
A trimmed sirloin
Shoulder before and after removal of the meat
Bottom L to R:
Haunches with pelvis removed
You can clearly see the seam on the haunch that you can follow with minimal cutting
Clockwise from left: shank, thick flank, silverside, topside, (bottom) rump, (centre) salmon cut
Related Articles
Rifles
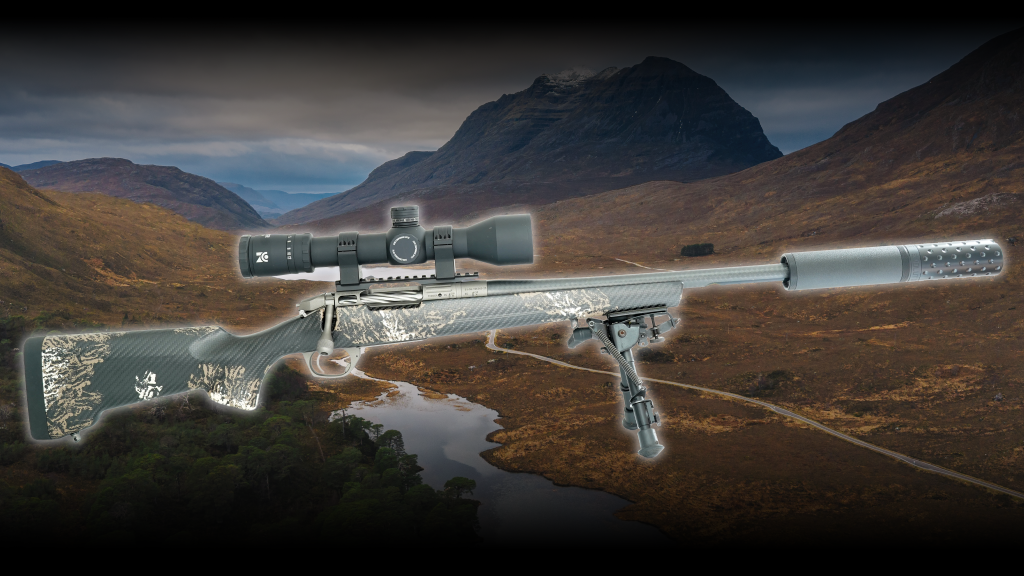
Bergara Premier CIMA Pro: Is this the ultimate lightweight hunting rifle?
From the hills to the woods: see why the Bergara Premier CIMA Pro stands out. We cover specs, carbon-fibre tech, and first impressions of this premium hunting rifle
By Rifle Shooter
Gear
Product reviews
Rimfire
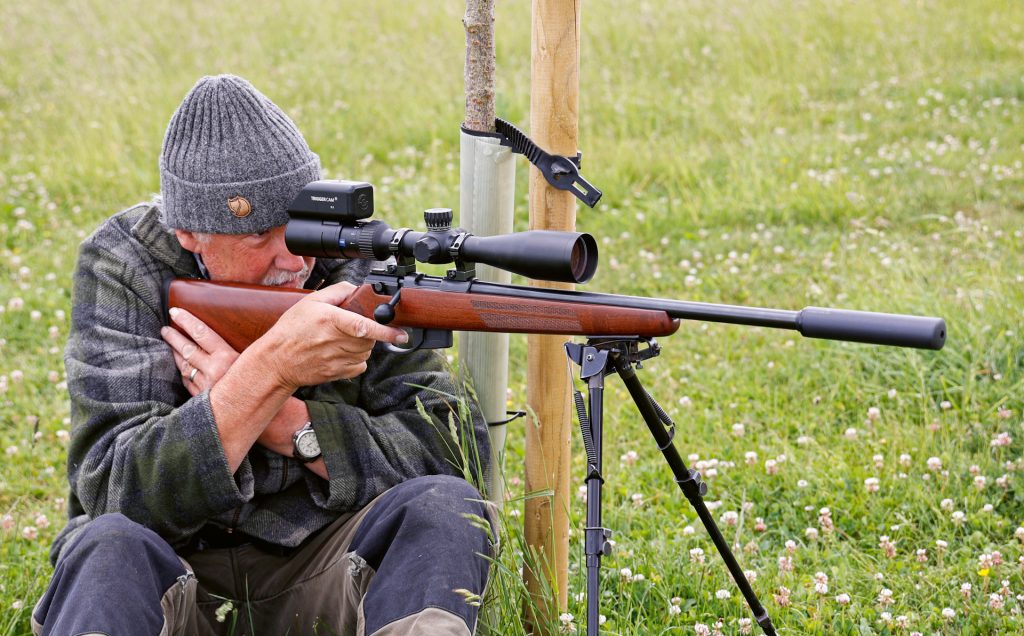
Anschütz 1761 Classic: Rabbiting royalty
With its compact format and crisp trigger, the Anschütz 1761 provides Bruce Potts with unmatched reliability and accuracy for some serious vermin control
By Robert Hardy
Put the phone down. Pick up the magazine.
Subscribe to Rifle Shooter
Rifle Shooter is Britain’s only dedicated rifle shooting publication – and at just £4.49 an issue, a subscription is the smartest decision you’ll make this season. That’s 44% off the newsstand price, delivered to your door before it hits the shelves.
Every bi-monthly issue is packed with rifle and optics reviews, stalking features, long-range technique and international hunting adventures. Each edition also features an exclusive interview with a guest editor from the very top of the sport – candid, first-hand insight you won’t find anywhere else.
No algorithms. No clickbait. Just exceptional rifle shooting content, crafted by people who live and breathe the sport.
Since launching in 2015, Rifle Shooter has built a loyal community of stalkers, target shooters and hunters who know that some things are worth reading properly. Join them.